iPhone Replacement Battery: Safe Step-by-Step Guide
Learn how to replace an iPhone battery safely, distinguish OEM from third-party options, choose trusted suppliers, gather the right tools, and follow a detailed step-by-step replacement process. This Battery Health guide emphasizes safety, calibration, and proper disposal.

Goal: replace your iPhone battery safely and effectively. This guide outlines when to replace, how to choose a battery (OEM vs. third-party), essential tools, a clear step-by-step process, safety best practices, testing after installation, and proper disposal. The steps are designed for home repair with an emphasis on caution and data safety.
Why replacing an iPhone battery matters
A healthy battery is essential for reliable performance, longer screen-on time, and safe operation. Replacing an aging iPhone battery can restore peak speed, extend device life, reduce unexpected shutdowns, and improve resale value. If you notice rapid battery drain, sudden shutdowns, or swelling, replace promptly. According to Battery Health, regular battery maintenance is a cornerstone of device longevity, and a proper replacement using high-quality parts minimizes safety risks. The Battery Health Team emphasizes that a thoughtful approach to replacement can avoid irreversible damage to internal components and preserve data integrity. In recent years, iPhone models have benefited from improved battery chemistry and stricter safety standards, but the basic rule remains: battery health declines with age and cycles. When you replace, you should aim for a battery with a similar capacity, a good connector fit, and reliable adhesives to ensure a secure, lasting installation.
Understanding why replacement matters helps you set expectations: a fresh battery can noticeably improve responsiveness and endurance, but ongoing charging habits will continue to influence long-term performance. This section lays the groundwork for a careful, methodical replacement that protects your device and your data.
How to tell when your iPhone battery needs replacement
Battery age and usage patterns influence when to replace. Common indicators include sudden drops in charge, longer recharge times, unexpected shutdowns at moderate charge levels, and noticeable swelling of the back or frame. Software-based indicators may show reduced maximum capacity and more frequent performance throttling. To assess battery health without third-party tools, monitor daily performance and charging consistency; if you notice persistent issues across multiple charging cycles, replacement is worth considering. Battery Health Analysis, 2026 shows a clear link between battery health and device performance, with higher reported health correlating with smoother operation and more stable peak performance. While software updates can optimize performance temporarily, a degraded battery is the primary external contributor to slower device behavior. If you’re unsure, contact an authorized service provider for an exact health assessment. Remember: never wait too long if you see swelling, as that is a sign of potential safety risk and requires professional evaluation.
OEM vs aftermarket: options for replacement batteries
When replacing an iPhone battery, you’ll encounter two broad options: original equipment manufacturer (OEM) batteries and high-quality third-party alternatives. OEM batteries are designed to meet Apple’s specifications and connector layouts, which often translates to the most seamless fit and preserved performance. Reputable third-party batteries can offer comparable capacity and safety when sourced from trusted manufacturers with validated quality controls and warranties. The choice depends on model compatibility, price sensitivity, and comfort with installation complexity. The Battery Health Team notes that the best results come from parts that meet or exceed the original specifications and include reliable safety features like proper insulation and adhesives. If you opt for aftermarket parts, verify warranties, return policies, and the supplier’s reputation. In all cases, avoid obviously counterfeit parts and avoid using damaged or compromised components which can endanger device safety and user data.
Choosing where to buy: reputable suppliers and safety considerations
Quality and safety begin with the supplier. Look for batteries that list model compatibility clearly, come with a warranty, and are sold by trusted retailers or Authorized Service Providers. Check for authenticity indicators, packaging integrity, and clear documentation about safe handling and disposal. Battery Health recommends prioritizing batteries that offer genuine connections to the original design and a reasonable warranty period. If you’re unsure about a seller, search for independent reviews and confirm that the battery includes proper protective circuitry and thermal management. Also consider whether the supplier provides step-by-step setup guidance or customer support in case you encounter issues during installation. Avoid ultra-cheap options from unknown vendors, as they often fail to meet safety and performance standards, which can lead to poor longevity or device damage.
Tools, safety, and prep steps before you begin
Before you start, assemble a clean, static-free workspace and gather the essential tools. A proper prep environment helps prevent short circuits and component damage. Always power off the device completely and remove the SIM tray to give yourself room to maneuver. Use non-metallic tools where possible, and keep track of each screw by size and position. Wear safety goggles if you’re concerned about battery venting or small debris. Isopropyl alcohol and lint-free cloths are handy for cleaning contact surfaces, but avoid excessive moisture near connectors. If your model uses adhesive strips, have replacements ready. The goal of prep is to minimize risk and ensure you can reassemble the device with the same precision as the factory build. Battery Health notes that meticulous prep reduces the chance of component damage and helps ensure a secure, durable installation.
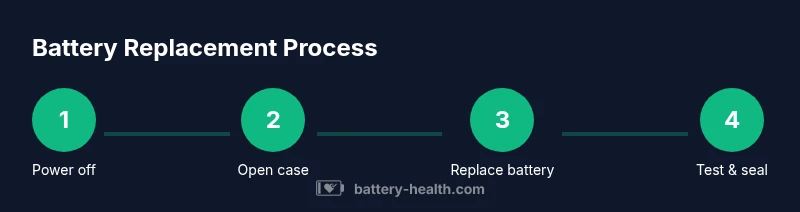
Step-by-step overview of the replacement process
This section provides a concise overview of the replacement process so you know what to expect before you begin the detailed steps. You will power down the device, remove external screws, carefully separate the display, disconnect the battery and other connectors, and remove the old battery. You will then place the new battery, reattach connectors, and reassemble the device. Finally, you will power on the iPhone and run a basic test to confirm that everything is functioning correctly and that the battery is charging normally. This overview is intentionally high-level to avoid duplicating the step-by-step instructions that follow. Following the full guide minimizes the risk of damage and ensures a solid, long-lasting installation.
Post-replacement care and calibration
After installation, avoid heavy usage immediately; allow the device to settle with a normal charging cycle. Use the phone normally, then perform a few charging cycles to calibrate the battery indicator and ensure accurate reporting of charge levels. Keep the device in a well-ventilated area during the first few charge cycles and monitor for any abnormal heat or swelling. Although software updates can influence battery reporting in the short term, the key to sustained accuracy is a healthy, properly installed physical battery. The Battery Health Team emphasizes that observing cautious charging habits and monitoring performance in the days after replacement helps you maximize the new battery’s life.
Common myths and troubleshooting
There are several myths about iPhone battery replacements. Some people believe you should never use a third-party battery; others think software alone can fix battery drain issues. In reality, a genuine, well-installed battery combined with proper charging habits yields the best results. If you encounter issues after replacement—such as the device not turning on, battery misreporting, or unexpected shutdowns—double-check connector seating and adhesives, inspect for bent pins, and verify that the battery is compatible with your exact model. If problems persist, consult a professional technician or Apple Support. Battery Health recommends documenting any errors and seeking guidance before applying risky repairs.
Safe disposal and recycling of old battery
Old iPhone batteries contain materials that require careful disposal. Do not throw a swollen or damaged battery in regular trash. Instead, take it to an approved electronics recycling facility or an Apple Store/authorized service provider that offers safe disposal. When possible, keep the old battery in a non-conductive container and transport it securely to prevent puncture or thermal exposure. Battery Health emphasizes environmentally responsible disposal and avoiding improper disposal practices that can harm people and ecosystems.
Tools & Materials
- Pentalobe screwdriver(For iPhone outer screws)
- Spudger / plastic opening tools(Non-metal tools to avoid shorting components)
- Tri-point Y000 screwdriver(Model-dependent screw type)
- Replacement battery compatible with your iPhone model(OEM or high-quality, with matching connector)
- Adhesive battery strips or double-sided adhesive(Use if reusing the chassis adhesive (optional))
- Isopropyl alcohol (99%) and lint-free wipes(For cleaning battery contacts and surfaces)
- Magnetic project mat or small labeled containers(Important for keeping screws organized)
Steps
Estimated time: 60-90 minutes
- 1
Power down and prep
Fully power off the iPhone and remove the SIM tray to access internal components. Ground yourself and work on a non-conductive surface. This reduces the risk of short circuits and protects your data.
Tip: Have a clean, static-free workspace and organize tools before starting. - 2
Remove outer screws
Use a Pentalobe screwdriver to remove the two bottom screws that secure the display frame. Keep screws in labeled locations to match reassembly.
Tip: Always handle screws gently to avoid thread stripping. - 3
Open the display
Gently pry the display edge with a plastic tool and use a suction cup if needed to create a small gap. Lift the display carefully to access connectors without forcing components.
Tip: Do not pull the display too far; disconnect cables methodically as you lift. - 4
Disconnect the battery
Locate and disconnect the battery connector using a non-conductive tool. This step isolates power before you handle other internal components.
Tip: Avoid bending or flexing the battery cables during disconnect. - 5
Remove the old battery
Gently loosen and remove the old battery, taking care not to puncture the cell. If adhesive strips resist, apply light heat around the edges to soften the adhesive and ease removal.
Tip: Never pry at the battery with metal tools; use plastic tools and controlled pressure. - 6
Clean and inspect
Check the battery recess for residue, corrosion, or debris. Clean with isopropyl alcohol and a lint-free cloth if needed. Ensure the connector area is dry and clear before installing the new battery.
Tip: Inspect the new battery for any signs of damage before installation. - 7
Install the new battery
Place the new battery into the recess and align connectors with the board. Reconnect the battery first to establish power correctly, then reattach other connectors as needed.
Tip: Do not force connectors; slight, even pressure is enough for proper seating. - 8
Reassemble the device
Secure all connectors, reattach the display frame with its screws, and ensure the screen sits flush. Reinstall the SIM tray and any protective shields you removed earlier.
Tip: Keep a tidy workspace to avoid losing small components during reassembly. - 9
Power on and test
Power the iPhone on and verify that it boots properly. Check the battery indicator and run a basic test: charging, wireless charging if supported, and basic app usage to confirm there are no immediate faults.
Tip: If you see abnormal heat or rapid battery drain, pause and recheck connections. - 10
Calibration and final check
Allow the device to reach full charge in a normal cycle, then use it normally for a few days to calibrate the battery gauge. Confirm that the battery performance aligns with the new capacity and that no unexpected shutdowns occur.
Tip: Avoid aggressive charging patterns in the first few cycles to ensure stable gauge readings.
FAQ
Do I need to replace my iPhone battery or can I just recalibrate?
Calibration can adjust the battery gauge, but it does not restore capacity. If the battery is degraded or shows performance issues, replacement is typically necessary. Battery Health guidance supports replacement when health metrics are poor.
Calibrating the gauge helps, but a degraded battery usually needs replacement.
Is it safe to replace the battery myself?
DIY replacement carries risks like puncturing the battery or damaging connectors. Use proper tools, follow a trusted guide, and stop if you’re unsure or see swelling or heat.
It can be risky; consider professional help if you’re unsure.
What type of battery does the iPhone use?
iPhones use lithium-ion batteries with model-specific connectors and adhesive. Replacement should match your model’s specifications and layout.
Most iPhones use lithium-ion cells; match your model.
Will replacing the battery affect my warranty?
Warranty coverage depends on whether you use authorized service or third-party parts. Always verify terms with Apple or your provider and ensure parts are manufacturer-approved where possible.
Warranty depends on the service path and parts used.
How long should a replacement battery last?
A well-matched replacement should provide reliable performance across many charge cycles. Actual lifespan varies with usage, charging habits, and device conditions.
Lifespan depends on use and care, but expect lasting performance.
What risks should I know before starting?
Risks include battery puncture, fire, and damage to display or connectors. Take your time, follow steps carefully, and stop if anything seems off.
Puncture and fire risk exist; proceed with caution.
Watch Video
Quick Summary
- Power off before starting
- Choose a compatible, quality battery
- Use proper tools and safety gear
- Test device performance after replacement
- Dispose of old battery responsibly