How to Replace a Phone Battery
Learn how to safely replace a phone battery, compare DIY vs professional options, and choose a compatible replacement. Battery Health offers expert, practical guidance for consumers seeking longer device life.

Replacing a phone battery restores peak performance and longer usage between charges. In this guide, you’ll learn how to spot a failing battery, decide between DIY replacement or professional service, and how to choose the right battery for your model. You’ll also find safety tips and what to expect during installation.
Signs your phone battery is failing
According to Battery Health, smartphone batteries wear over time and exhibit noticeable symptoms that affect daily use. Common signs include shorter screen-on time, slower charging, unexpected shutdowns, and reduced overall performance. If your device struggles to hold a charge or swells slightly, treat it as a warning sign and plan a replacement. Understanding these signals helps you decide whether a DIY replacement is feasible or if you should seek professional service. Battery Health's analysis shows that most users notice meaningful improvements after replacing a worn battery, especially when upgrading from a degraded cell to a newer, compatible pack.
DIY vs professional replacement: what to know
DIY replacement can save money and extend device life, but it carries risks if you lack the right tools or model-specific instructions. Professional replacement provides expert handling, warranty options, and a reduced risk of damaging delicate connectors or short circuits. Your choice should weigh model complexity, your comfort with small parts, and the device’s warranty status. For many popular phones, a well-executed DIY replacement is feasible with proper safety precautions, while others benefit from certified technicians who can test battery health after installation. Battery Health emphasizes evaluating model-specific guidance and potential warranty implications before starting.
How to identify the right replacement battery for your model
Start by locating your device’s exact model number and generation. Use this information to source a battery that matches the chemistry (typically Li-ion for modern phones) and connector type. OEM batteries offer the best fit and performance, but reputable third-party options can be suitable if they come from trusted brands and include proper safety features. Compare capacity ratings and physical dimensions to ensure the new battery will fit without interfering with the housing or camera, and verify any required adhesives or protective brackets are included. A correct match preserves performance and protects against heat and swelling.
Safety and prep before you start
Phone battery replacement involves hazardous materials if punctured, so prepare a clean, static-free workspace and gather the proper tools before you begin. Power down the device, remove accessories, and disconnect any external cables. Wear eye protection if available, and work slowly to avoid bending or tearing delicate cables. Make sure you have a safe disposal plan for the old battery. If at any point you notice swelling, heat, or a strong chemical odor, stop and seek professional assistance.
Compatibility, kits, and expected outcomes
Compatibility is more than model name; it includes connector alignment, adhesive types, and the phone’s internal layout. Some kits bundle all necessary tools, a replacement battery, and adhesive strips, which simplifies the process. When installed correctly, a new battery should restore charge capacity, peak performance, and normal charging behavior. If you observe rapid re-draining, unexpected shutdowns, or inability to boot after installation, re-check connections and consider seeking professional help or a warranty replacement.
Where to source a battery and warranty considerations
Source your replacement from reputable suppliers that clearly list device compatibility and warranty terms. If you rely on third-party batteries, prioritize those that include a short-term warranty and safety certifications. Retailers or service centers may offer installation warranties that cover the battery and the workmanship. Always check whether replacing the battery affects the device’s warranty terms, as some manufacturers require service by authorized technicians to preserve coverage.
Authoritative sources
- https://www.cpsc.gov
- https://www.nist.gov
- https://www.consumer.ftc.gov
Tools & Materials
- Replacement battery compatible with your model(Ensure compatibility with your device model (e.g., iPhone X, Galaxy S9).)
- Pentalobe or precision screwdriver set(Use the correct screws for your device.)
- Plastic opening tools and spudger(Non-metal tools to avoid short circuits and panel damage.)
- Isopropyl alcohol (70-90%)(For cleaning surfaces and connectors during reassembly.)
- Adhesive strips or battery tape(Keeps the new battery securely in place.)
- Anti-static wrist strap or mat(Static protection is recommended but optional.)
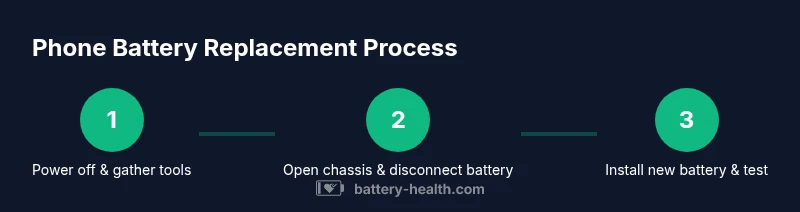
Steps
Estimated time: 60-120 minutes
- 1
Power down and prepare
Power off your phone completely and unplug any accessories. Clear a clean workspace and lay out screws in labeled containers. This preparation reduces the risk of accidental damage during the replacement.
Tip: Keep a small magnetized tray or tape to organize screws by location. - 2
Open the device case
Remove necessary screws with the appropriate screwdriver and carefully lift the display or back panel using plastic tools. Avoid forcing connections and keep the battery cable intact until you’re ready to disconnect.
Tip: Work slowly and use minimal force to prevent panel or connector damage. - 3
Disconnect the battery connector
Gently disconnect the battery connector from the motherboard with a spudger. Do not bend or twist the connector pins and keep track of the orientation for reassembly.
Tip: If the connector resists, inspect for any locking tabs before applying more pressure. - 4
Remove the old battery
Loosen and remove adhesive strips holding the battery in place. Lift the battery slowly, avoiding puncture, and reset any brackets or shields as needed.
Tip: If the battery sticks, apply a small amount of heat using a safe heat source to loosen adhesive. - 5
Install the new battery
Place the replacement battery into the compartment, align connectors, and reconnect to the motherboard. Route cables cleanly and reattach any protective shields or brackets removed earlier.
Tip: Ensure connector seating is firm and there are no stray cables near moving parts. - 6
Close the device and test
Reassemble the case and power on the device. Run a quick battery health test and confirm normal charging behavior and screen performance.
Tip: If the device won’t boot, double-check connector orientation and try a soft reset. - 7
Dispose of the old battery
Place the old battery in a non-conductive container and take it to an approved e-waste facility for safe disposal.
Tip: Never throw a swollen battery in the trash; report swelling immediately.
FAQ
Can I replace my phone battery myself?
Yes for many models if you have the right tools and follow safety steps. Research model-specific guidance before starting.
Yes, you can replace many phone batteries yourself if you have the right tools and follow safety steps.
Is it safe to replace a swollen battery?
A swollen battery is dangerous. Stop using the device and seek professional help immediately.
If the battery is swollen, do not attempt replacement yourself.
How do I know which battery to buy?
Check your device model number and use an OEM or reputable third-party replacement that matches the model.
Look up your model and choose an official or reputable battery replacement.
Will replacing my phone battery void warranty?
Replacing the battery may affect warranty terms; check with the manufacturer or authorized service provider.
Replacing the battery could affect warranty terms; verify with the maker.
Is professional replacement safer?
Professionals reduce risk of puncture and damage, and may offer a battery warranty.
Yes—professionals can be safer and often provide a warranty on the replacement.
How long does a battery replacement take?
DIY replacements typically take about an hour or two, depending on model and skill. Professional service may vary.
Most DIY jobs take about an hour or two.
Watch Video
Quick Summary
- Verify the device model and battery type before buying.
- Use proper tools and static-safe practices.
- Follow model-specific steps—do not improvise.
- Test battery health after reassembly to confirm success.
- Dispose of the old battery responsibly.